Windows subsystem for Linux
Contents
- WSL2 installation
- X11 server installation
- Anaconda installation
1. WSL2 installation
2020년 05월 windows 10 update를 통해 Windows subsystem for Linux 2 (WSL2)가 정식 설치가 가능해졌습니다. WSL2를 이용하면 Windows 10 환경에서 Linux 를 구동할 수 있고 구축된 Linux 환경에서 Ubuntu를 설치하여 python code 개발 통합환경인 Anaconda를 설치할 수 있습니다. 우선 아래 링크를 참조하여 WSL2 및 Ubuntu 설치를 진행합니다.
WSL2 installation: [Link]
Error: 0x8037012 Error: [Link]
2. X11 server (visualization)
가상머신에서 시각화를 위해서 GUI 프로그램인 VcXsrv를 설치하도록 합니다: [Link]
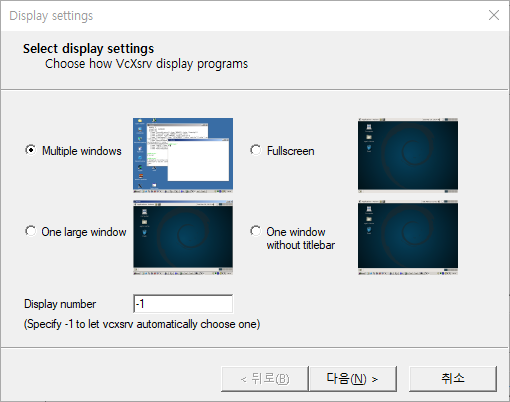
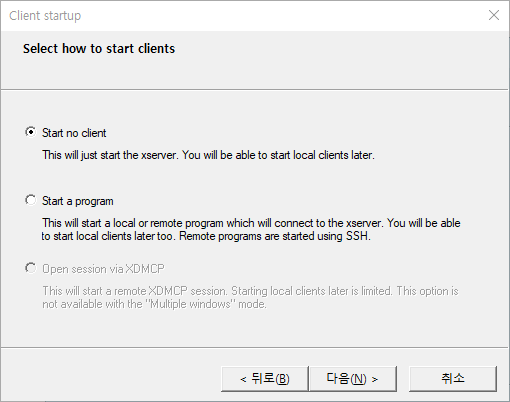
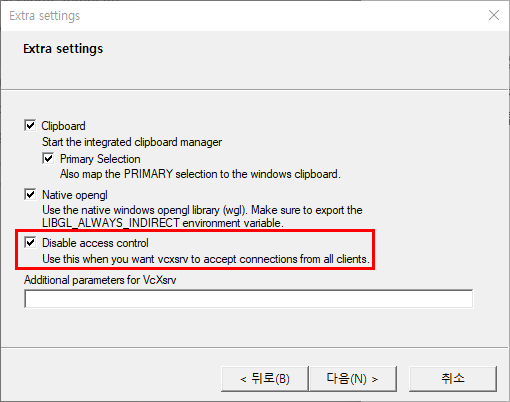
설치 후에 생성된 Xlaunch를 실행하고 아래와 같은 설정을 입력합니다.
설정을 완료하면 백그라운드에 Xlaunch가 실행됩니다. 이를 확인하고 Ubuntu terminal에서 GUI가 제대로 작동하는지 확인하기 위해 xeyes를 실행시켜 봅니다. 우선 x11 프로그램을 Ubuntu 환경에 설치하겠습니다.
apt-get install x11-apps
설치가 완료되면 다음과 같은 명령어를 시도해봅니다.
xeyes
정상적으로 설치가 진행이 되었다면 다음과 같은 프로그램이 실행되는 것을 확인할 수 있습니다.

그러나 xeyes가 실행되지 않는다면 다음과 같은 조치를 취합니다.
vi ~/.bashrc
위 명령어를 구동하면 vim 에디터를 실행되며 bashrc의 코드가 확인할 수 있습니다. bashrc에는 bash 환경이 처음 실행될때 자동으로 동작되는 명령어들이 작성되어있습니다. 이의 마지막 줄에 아래의 코드를 추가합니다. 이에 대한 자세한 방법은 아래과 같습니다. (기본적인 vim 에디터 사용법 [Link]).
i를 통해 입력 모드로 전환- 방향키를 통해 코드를 추가할 맨 아래줄로 이동
- 아래 코드작성
export DISPLAY=$(cat /etc/resolv.conf | grep nameserver | awk '{print $2}'):0
Esc를 통해 명령어 모드로 전환:wq를 통해 저장 후 종료
마지막으로 아래 명령어를 통해 설정한 bashrc 파일을 bash 환경에 동기화시켜주도록 하고 다시 xeyes가 작동하는지 확인합니다.
source ~/.bashrc
3. Anaconda installation on Linux environment
우선 Anaconda 설치용 shell script를 설치합니다: [Link]

설치된 파일[e.g. 2021년 2월 17일 기준 최신버젼: Anaconda3-2020.11-Linux-x86_64.sh]을 c: 드라이브의 기본 위치에 옮기고 Ubuntu를 실행합니다(. 다음과 같은 명령어를 통해 설치한 파일을 Linux 환경에 복사하도록 합니다.
cp /mnt/c/Anaconda3-2020.11-Linux-x86_64.sh ~/.
이제 아래와 같이 bash shell 에서 ls 를 치면 Anaconda3-2020.11-Linux-x86_64.sh 파일이 해당 경로로 이동했음을 확인할 수 있습니다. 다음 명령어를 통해 설치 파일을 실행시킵니다.
bash Anaconda3-2020.11-Linux-x86_64.sh
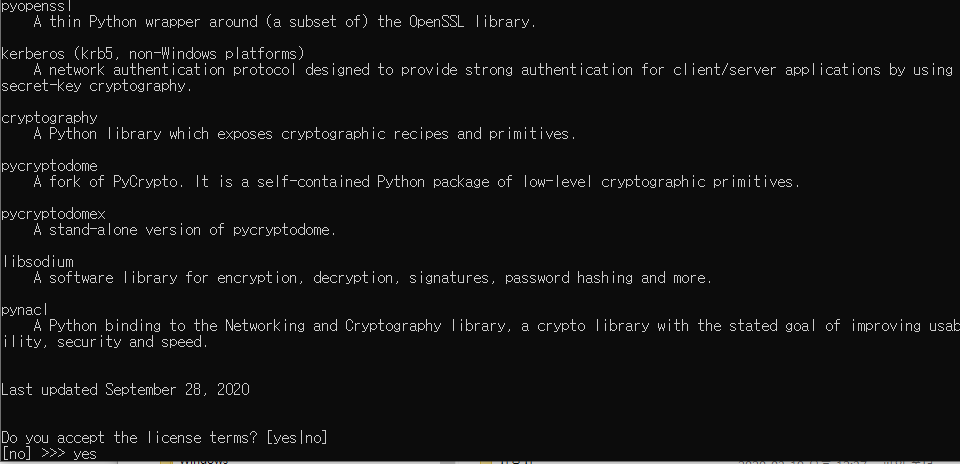
라이센스 서약을 Enter 를 통해 읽고 yes 를 입력하여 다음으로 진행:
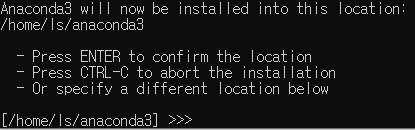
Enter 를 입력하여 Anaconda3 설치 위치 설정:
설치 진행이 완료되면 다음과 같은 명령어를 통해 Anaconda3가 제대로 설치된 것을 확인 할 수 있습니다.
anaconda-navigator

Text editor: Emacs installation
Unix 환경에서 유용한 text editor인 emacs를 설치합니다:
sudo add-apt-repository ppa:kelleyk/emacs
sudo apt update
sudo apt install emacs26
How to use Emacs: [Link]
Run Jupyter notebook
Python 코드를 실행해볼 수 있는 Jupyter notebook를 원격 브라우저 환경에서 실행시기키 위해서는 다음과 같은 방법을 따릅니다.
Firefox browser installation
sudo add-apt-repository ppa:ubuntu-mozilla-security/ppa
sudo apt-get update
sudo apt-get install firefox
Firefox browser가 설치된 이후에서는 Jupyter notebook의 설정에서 browser의 경로를 지정해주어야 한다.
cd ~
jupyter-notebook --generate-config
cd .jupyter
emacs jupyter_notebook_config.py &
Emacs 에디터가 열리면 /c.NotebookApp.browser 을 입력하여 관련 키워드를 검색합니다.
발견된 위치에 해당하는 코드의 줄을 다음과 같이 수정합니다(주석 문자 # 지움).
c.NotebookApp.browser = '/usr/bin/firefox %s'
이를 통해서 Jupyter notebook가 실행될 때 자동으로 Firefox browser를 통해 실행될 수 있게 합니다.
(Optional: not using the remote browser)
위의 옵션을 수정하는 대신 /c.NotebookApp.open_browser 을 입력하여 관련 키워드를 검색합니다. 발견된 위치에 해당하는 코드의 줄을 다음과 같이 수정합니다(주석 문자 # 지움). 이를 통해서 Jupyter notebook가 실행될 때 자동으로 브라우저를 실행하지 않도록 할 수 있습니다.
c.NotebookApp.open_browser = False
이제 다음과 같은 명령어를 통해 Jupyter notebook를 실행시킵니다.
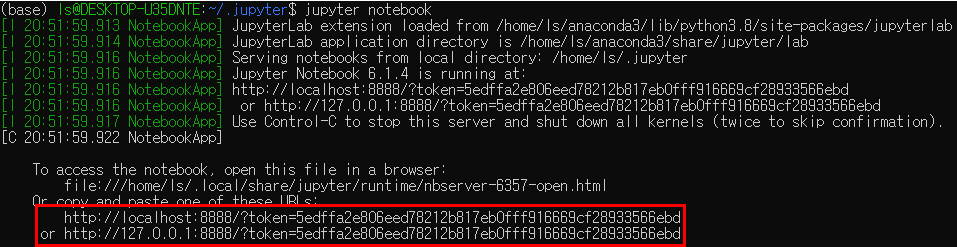
jupyter notebook
(Optional: not using the remote browser)의 방법을 사용한 경우는 아래와 같이 나타난 URLs 정보를 복사하여 자신의 브라우저 환경에 입력하면 Jupyter notebook에 접근할 수 있습니다.